PROFILE OPTIONS IN BILLS OF MATERIALS
Profile Option
|
User
|
System Administrator
|
Requirements
|
User
|
User
|
Resp
|
App
|
Site
|
Required?
|
Default Value
|
|
|
|
|
|
|
|
|
BOM: Check for Duplicate Configuration
|
-
|
|
|
|
|
Optional
|
No
|
BOM: Component Item Sequence Increment
|
-
|
|
|
|
|
Optional
|
10
|
BOM: Configuration Item Delimeter
|
-
|
|
|
|
|
Optional
|
No
|
BOM: Configuration Item Type
|
-
|
|
|
|
|
Optional
|
No
|
BOM: Days Past Before Starting Cutoff of Order Entry Bills
|
-
|
|
|
|
|
Optional
|
0
|
BOM: Default Bill of Material Levels
|
-
|
|
|
|
|
Optional
|
1
|
BOM: Default WIP Supply Values for Components
|
-
|
|
|
|
|
Optional
|
Yes
|
BOM: Hour UOM
|
-
|
|
|
|
|
Optional
|
1 ?
|
BOM: Inherit Option Class Operation Sequence Number
|
-
|
|
|
|
|
Optional
|
No
|
BOM: Model Item Access
|
-
|
|
|
|
|
Optional
|
Yes
|
BOM: Perform Lead Time Calculations
|
-
|
|
|
|
|
Optional
|
No
|
BOM: Planning Item Access
|
-
|
|
|
|
|
Optional
|
Yes
|
BOM: Standard Item Access
|
-
|
|
|
|
|
Optional
|
Yes
|
BOM: Update Resource UOM
|
-
|
|
|
|
|
Optional
|
No
|
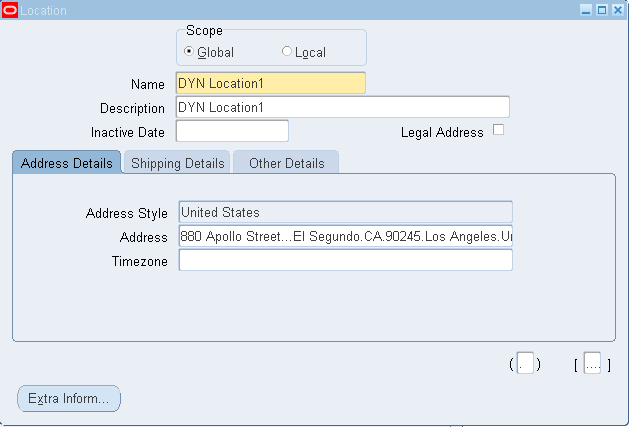
STEP 1: CREATE LOCATIONS
Define the manufacturing Location
Responsibility: Bills of Materials Navigation: Setup > Locations
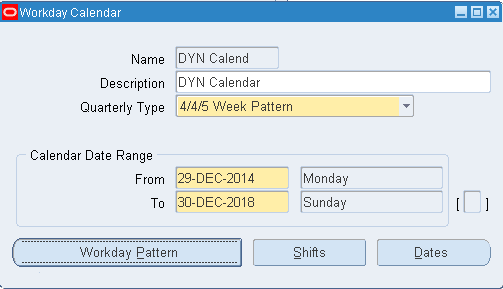
STEP 2: CREATE CALENDAR
Define the manufacturing Calendar
Responsibility: Bills of Materials Navigation: Setup > Calendars
Define Workday Pattern, Shifts & Timings:
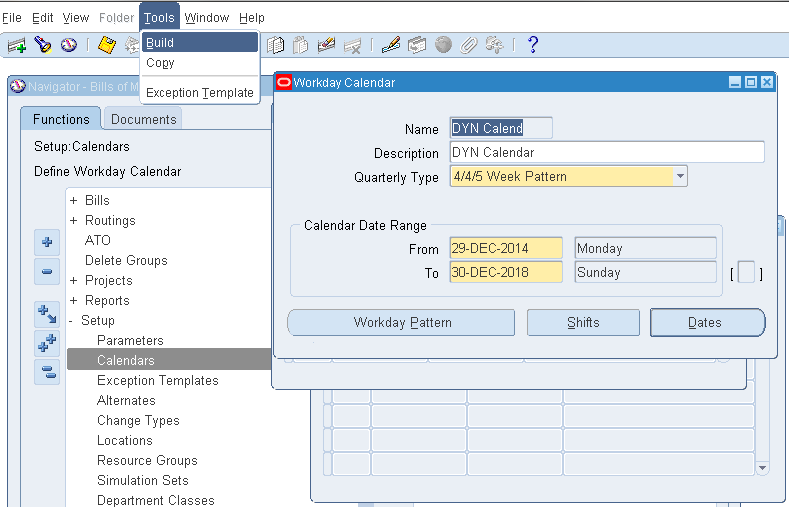
Build Calendar:
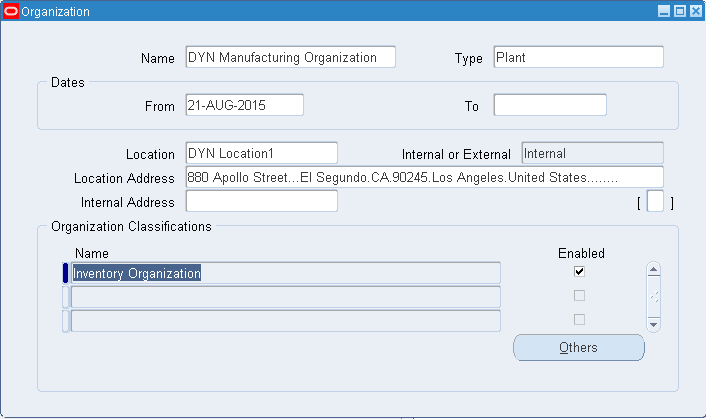
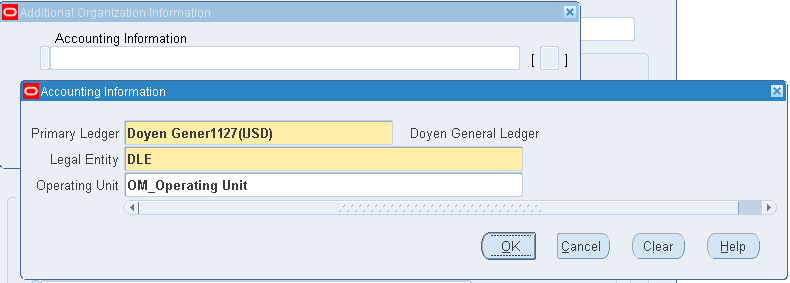
STEP 3: CREATE MANUFACTURING ORGANIZATION
Responsibility: Inventory Navigation: Setup > Organizations > Organizations
Enter Accounting Information:
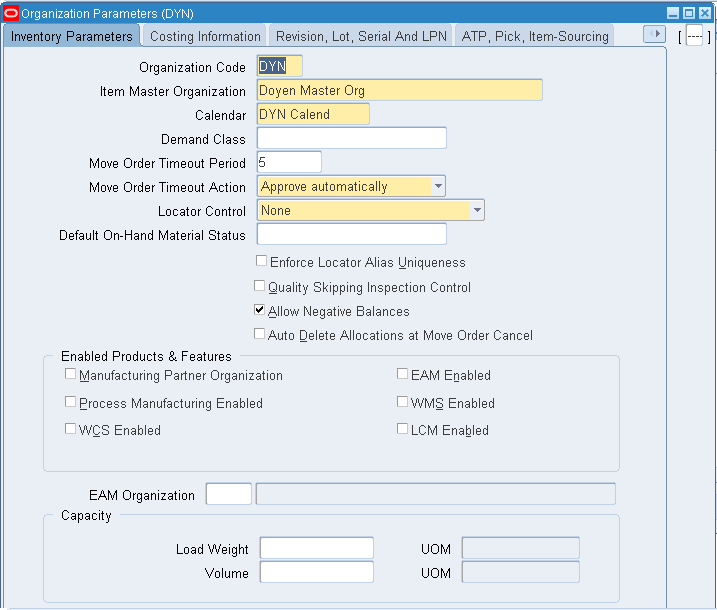
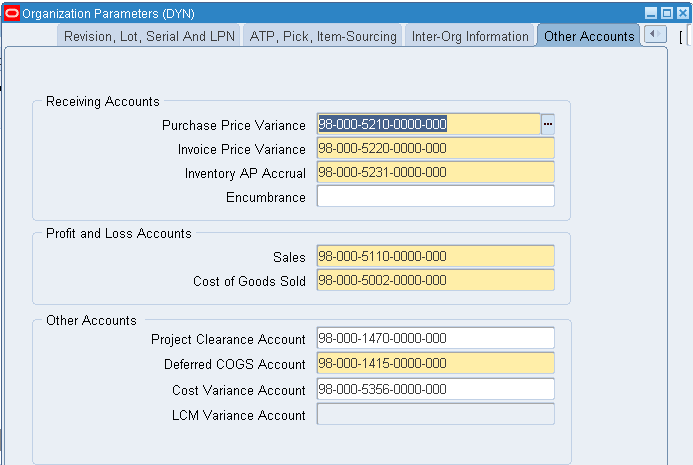
Enter Inventory Information:
Create a Standard Costing Organization and assign the manufacturing calendar and enter all the required GL Code combinations in accounts fields.
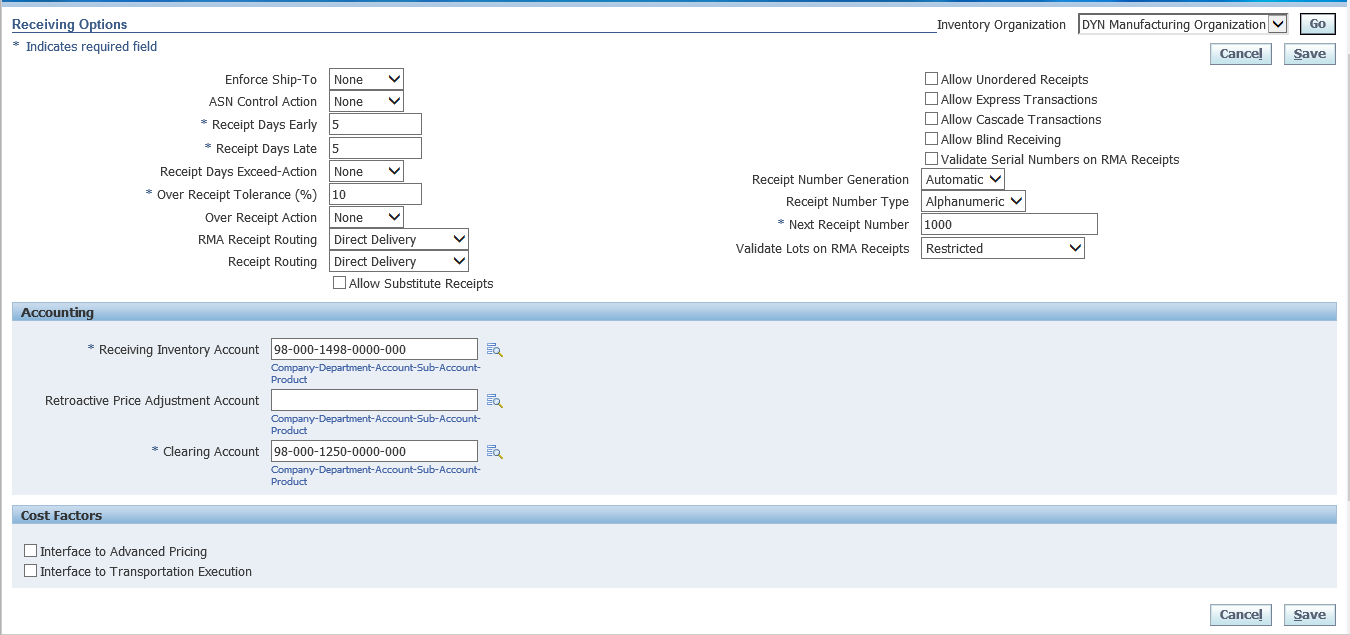
Enter Receiving Information:
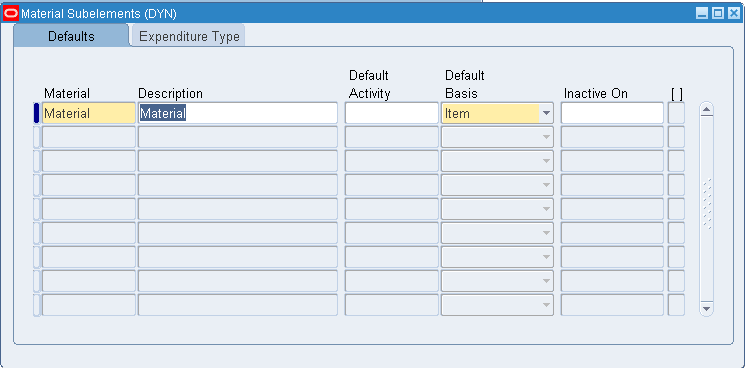
STEP 4: CREATE MATERIAL SUB-ELEMENTS
Responsibility: Inventory Navigation: Setup > Costs > Sub-Elements > Materials
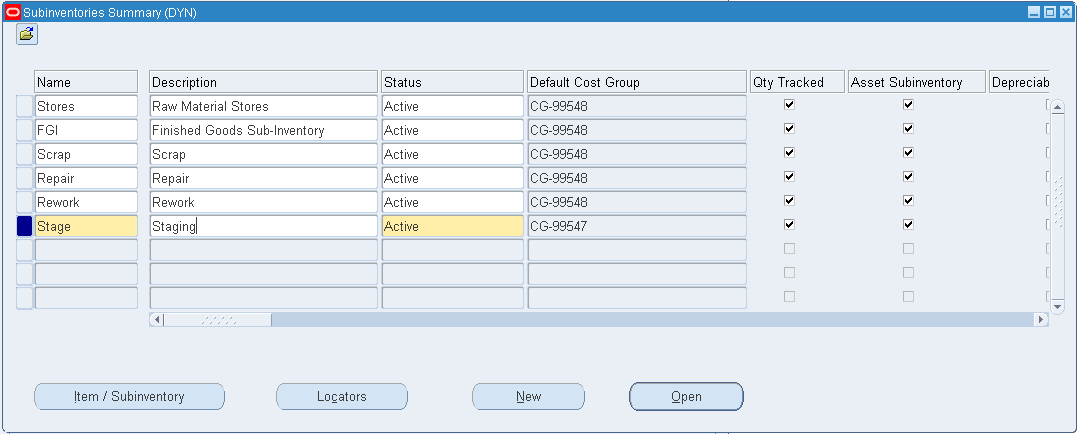
STEP 5: DEFINE SUB-INVENTORY
Responsibility: Inventory Navigation: Setup > Organizations > Sub-inventories
Create the below sub-inventories under the newly created manufacturing organization
STEP 6: DEFINE BOM PARAMETERS
Responsibility: Bills Of Materials Navigation: Setup > Parameters
Note:
If you have not defined the BOM Parameters then you will get the below error message while opening the Bills form
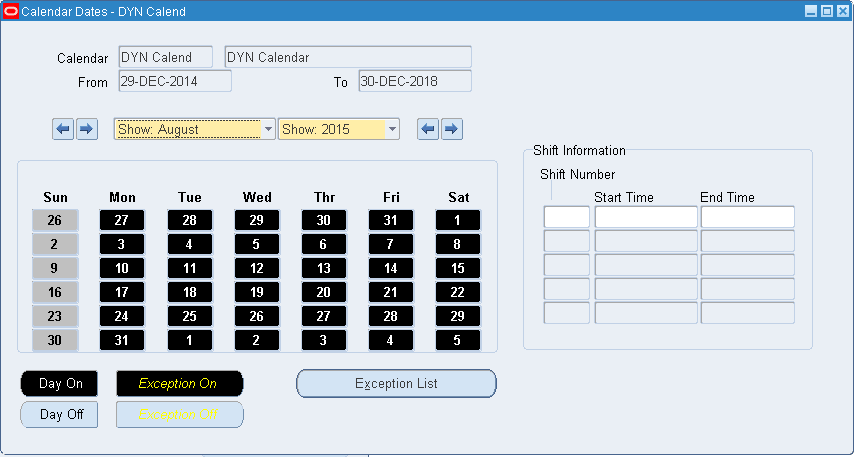
STEP 7: DEFINE EXCEPTION TEMPLATES
Responsibility: Bills Of Material Navigation: Setup > Calendar OR Exception Templates
Query the Manufacturing "Calendar" and click on "Dates"
As per the manufacturing calendar, all Sundays are leave. In case of any business requirement if you would like to make some Sundays as a working day then you can define the Exception Templates and enter those days as a working days
Click on "Exception List"
Click "OK"
As soon as you save the Exception List, it will reflect in your calendar
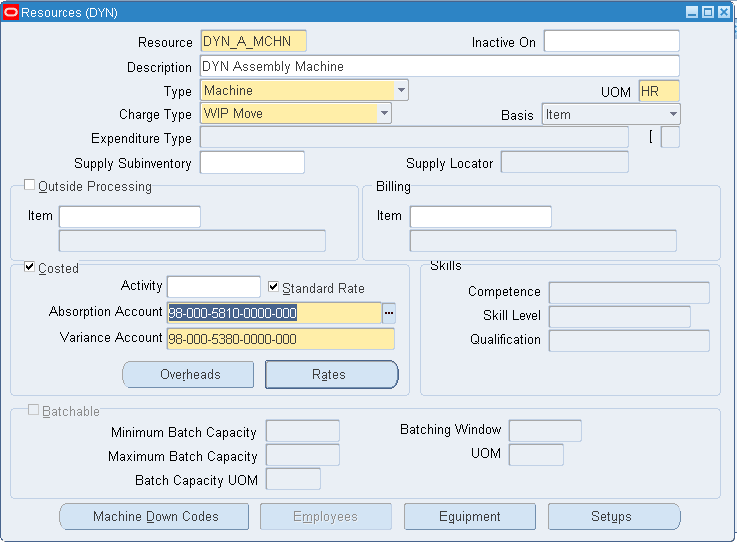
STEP 8: DEFINE RESOURCES
Responsibility: Bills of Materials Navigation: Routing > Resources
Define one Assembly Machine Resource with Charge Type as "WIP Move"
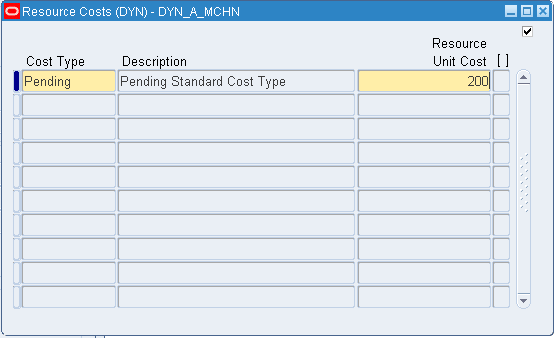
Define Resource Rates:
After enabling the "Costed" and "Standard Rate" check boxes, click on "Rates"
Save and close this form.
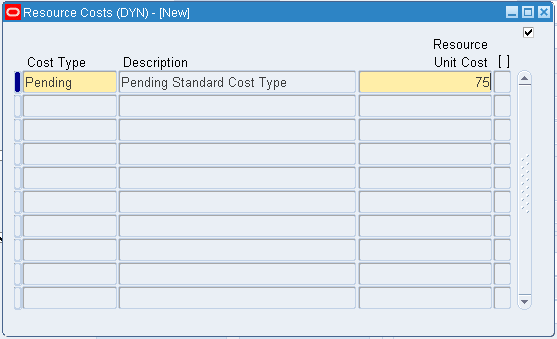
Likewise create one Assembly Person Resource with Charge Type as "WIP Move"
Click on "Rates"
Note:
1. Defined the below Resources
Resource Name
|
Description
|
Type
|
UOM
|
Charge Type
|
Rate
|
DYN_A_MCHN
|
DYN Assembly Machine
|
Machine
|
HR
|
WIP Move
|
200
|
DYN_A_LBR
|
DYN Assembly Labour
|
Person
|
HR
|
WIP Move
|
75
|
DYN_HELPER
|
DYN Helper
|
Person
|
HR
|
WIP Move
|
50
|
DYN_TESTER
|
DYN Tester
|
Person
|
HR
|
WIP Move
|
100
|
2. Various Resource Types:
Amount - We can use this type when we use money transactions
Currency - We can use this type when we use USD currency for transactions.
Machine - We can use this type when the resource is a Machine
Miscellaneous - We can use this type during OSP or other transactions
Person - We can use this type when the resource is a Human/Person
3. Various Charge Types:
Manual - Charges will trigger when we manually move the Resources in Jobs
PO Receipt - Charges will trigger when we do PO Receipts for OSP Purchase Orders
PO Move - Charges will trigger when we complete the PO Receipts and do Move Transactions in OSP Operation
WIP Move - Charge will trigger when we do the Move Transactions in Discrete Jobs
4. When defining the Rates for Resources, we should define the rates using "Pending" Cost Types. Because this is a Standard Costing Organization.
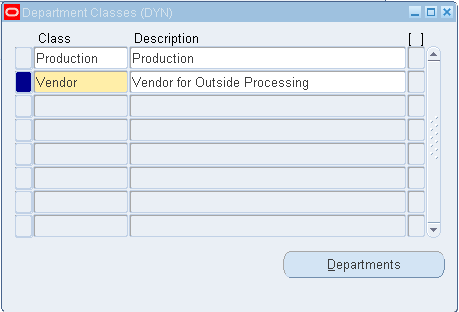
STEP 9: DEFINE DEPARTMENT CLASSES
You can define department classes to group departments and to identify manufacturing cells. This information is for your reference only.
Responsibility: Bills Of Materials Navigation: Setup > Department Classes
Enter the Department Classes and it's Description
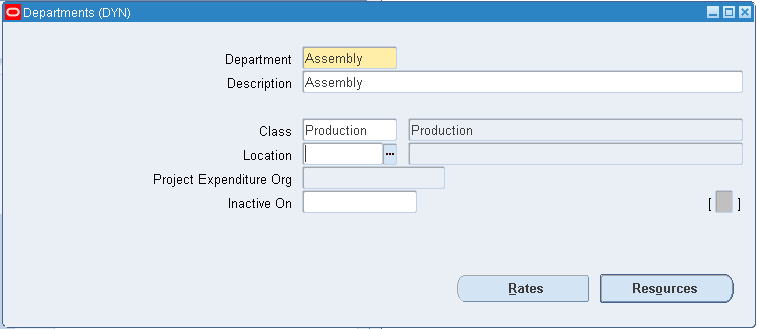
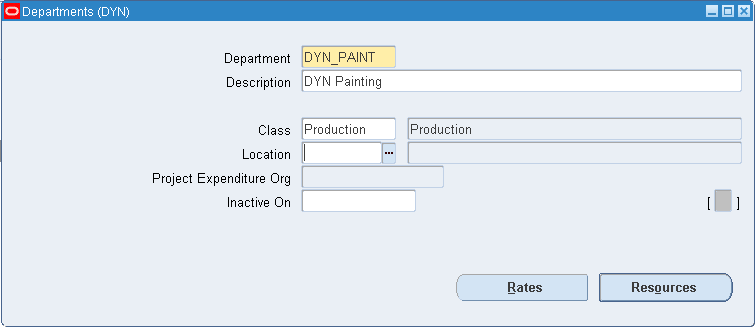
STEP 10: DEFINE DEPARTMENTS
You can define departments as areas within your organization where you perform work and/or collect costs.
Responsibility: Bills of Materials Navigation: Routings > Departments
Enter the Department Name and Description along with the Department Class
Assign Resources to department:
Click on "Resources"
Attached two resources for the Department "Assembly"
If you want to enter the Overhead Rates for this Department then you can click on Rates and enter the Amount
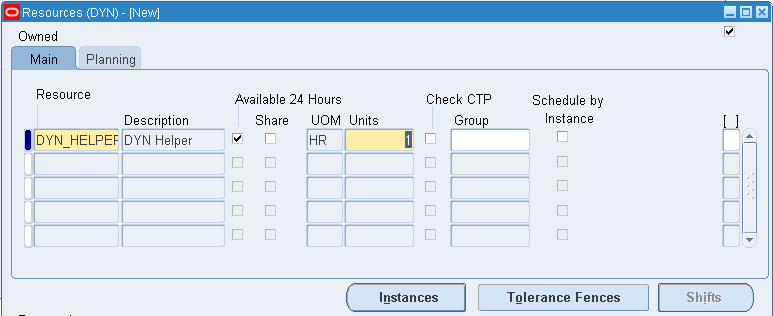
Create a Department for Painting and Assign the Resource
Click on "Resources"
Define one more department for QC and assign the resource
Note:
All the department resources are available for 24 Hours. If that department resource is not available for 24 hours then uncheck "Available 24 Hours" check box and enter the timing in "Shifts"
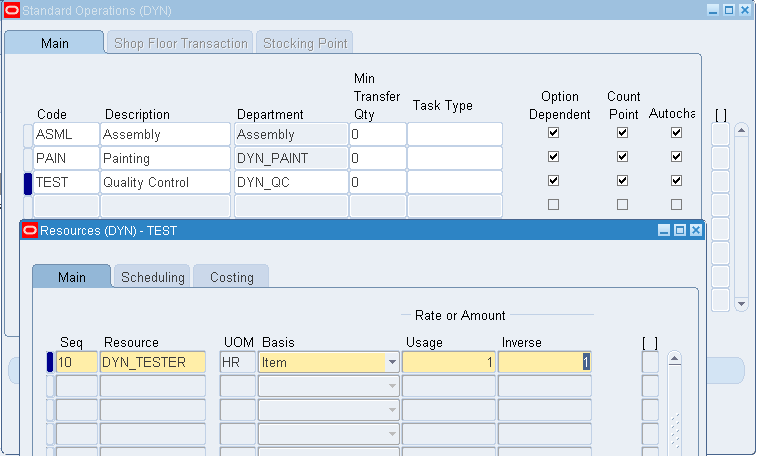
STEP 11: DEFINE STANDARD OPERATIONS
Responsibility: Bills Of Materials Navigation: Routing > Standard Operations
Enter the Standard Operations Code and attach the Department
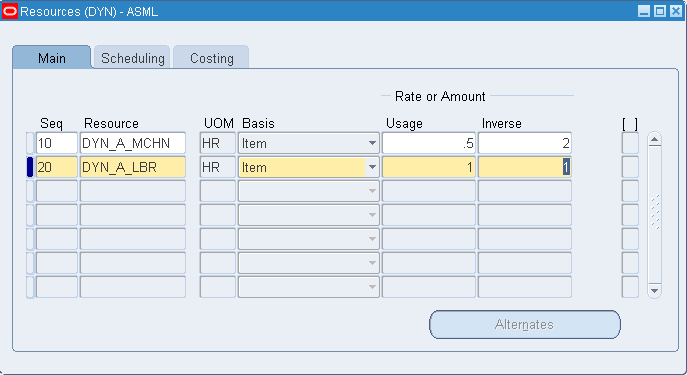
Assign Resources to Standard Operations:
Click on "Operation Resources" and assign the Resources
Usage & Inverse: If we use the Resource "DYN_A_MCHN" for half an hour (Usage) then we can produce 1 unit (Inverse). Otherwise, if we want 2 Units output then we need to use the resource "DYN_A_MCHN" for 1 hour. At the same time, if we use the resource "DYN_A_LBR" for 1 hour then we will produce 1 Unit.
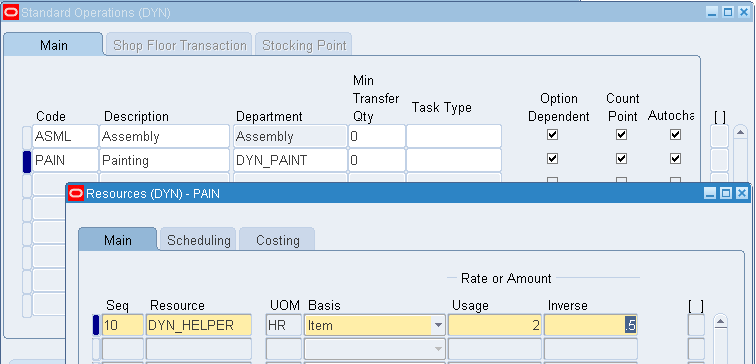
Likewise create the Standard Operations for Painting
Create on Standard Operation for Quality Checking
Note:
We should use the Painting resource for 2 hours to produce 1 unit. In other words, the painting resource can produce only half unit in 1 hour.
Similarly the tester resource can produce 1 unit in 1 hour.
Usage: How many hours we should use one particular resource to produce 1 Unit?
Inverse: What is the Output of one resource if we use that resource for 1 hour?
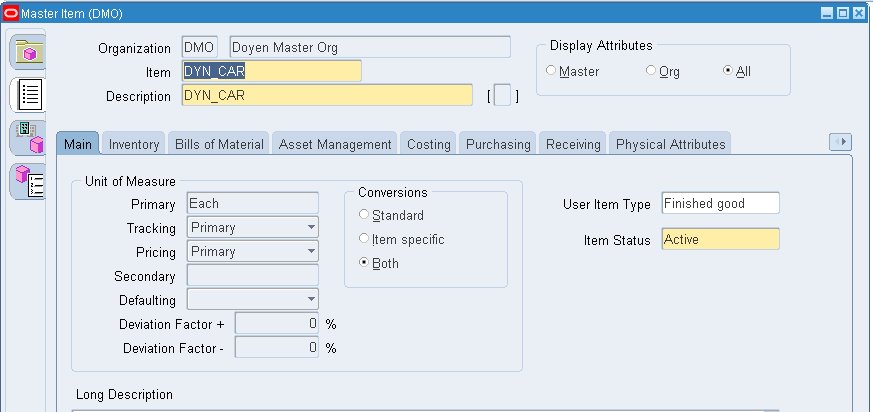
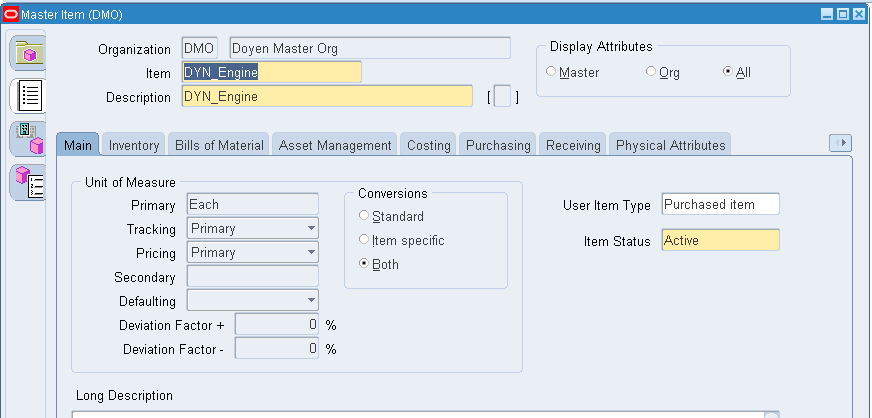
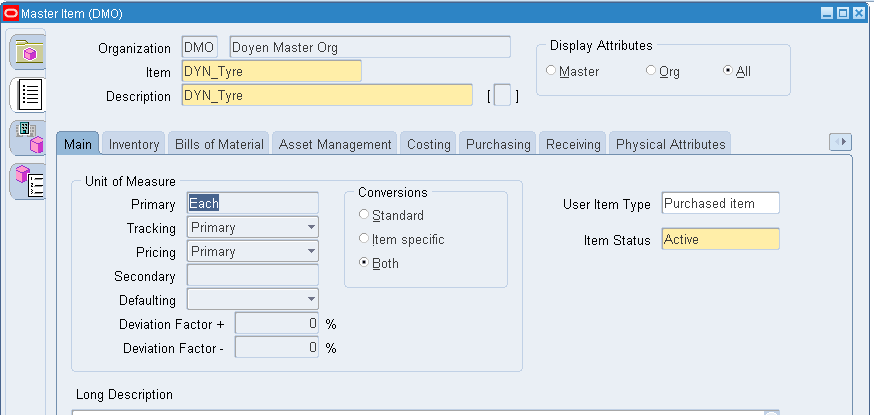
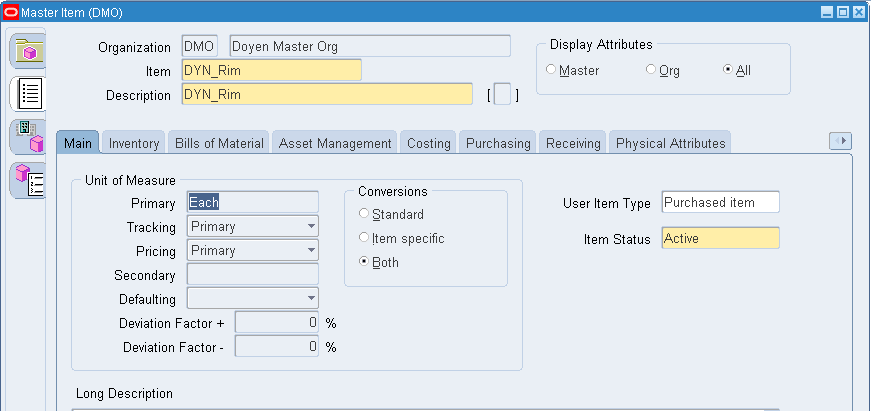
STEP 12: CREATE ITEMS
Create the below items and apply the proper item templates and then assign the cost.
Items
|
Template
|
Cost
|
DYN_CAR
|
Finished Goods
|
|
DYN_Engine
|
Purchased Item
|
500
|
DYN_Chasis
|
Purchased Item
|
400
|
DYN_Seat
|
Purchased Item
|
75
|
DYN_Wheel
|
Sub-Assembly
|
|
DYN_Tyre
|
Purchased Item
|
25
|
DYN_Rim
|
Purchased Item
|
30
|
DYN_Axle
|
Purchased Item
|
20
|
Responsibility: Inventory Navigation: Items > Master Items
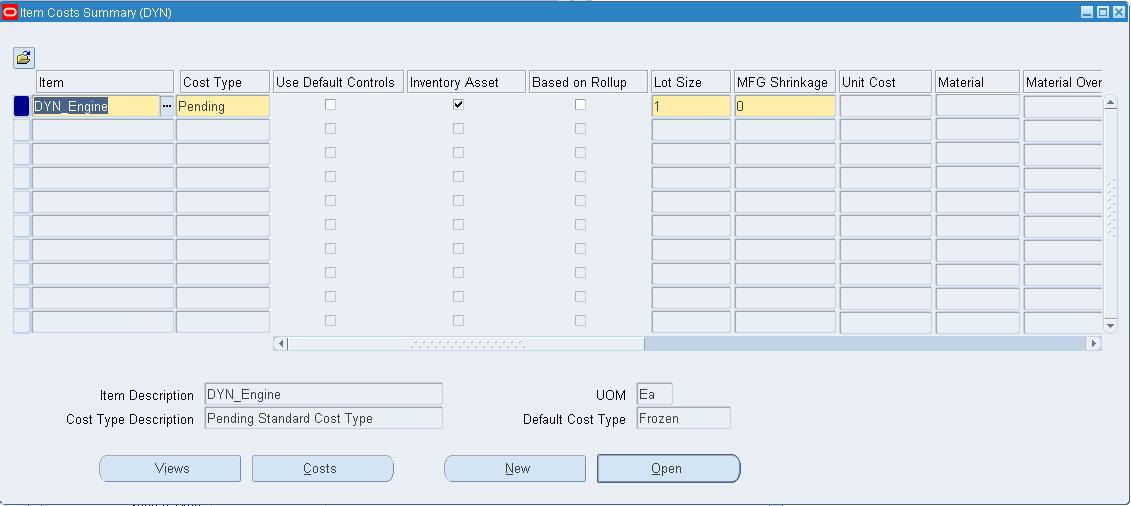
STEP 13: ENTER ITEM COST
Responsibility: Inventory Navigation: Costs > Item Costs
Click on "New" and enter the Item Code and Cost Type as "Pending"
Click on "Open" and then "Costs"
Likewise enter the costs for remaining items
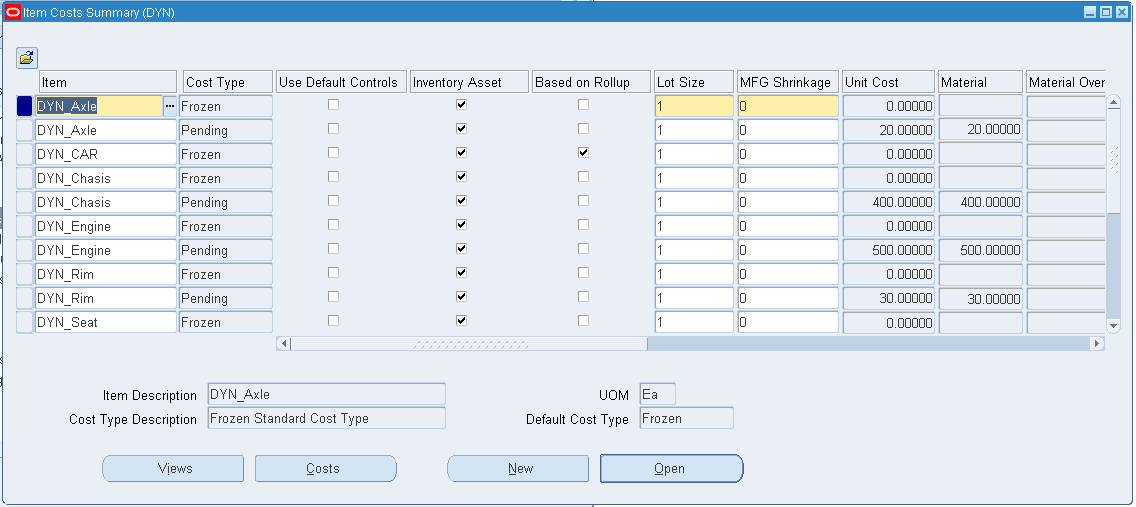
If you query these items again then, we can see one more record for each and every item in "Frozen" cost type
Note:
For every item will have 2 records. One record will be in "Pending" Cost Type and the another one will be in "Frozen" cost type. Because, this DYN Organization is a Standard Cost Organization. By default the item cost will be defined in "Pending" cost type. Then if we run the "Update Standard Cost" program then the cost will be moved to "Frozen" Cost Type.
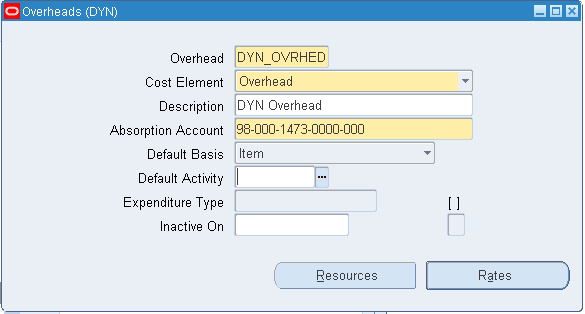
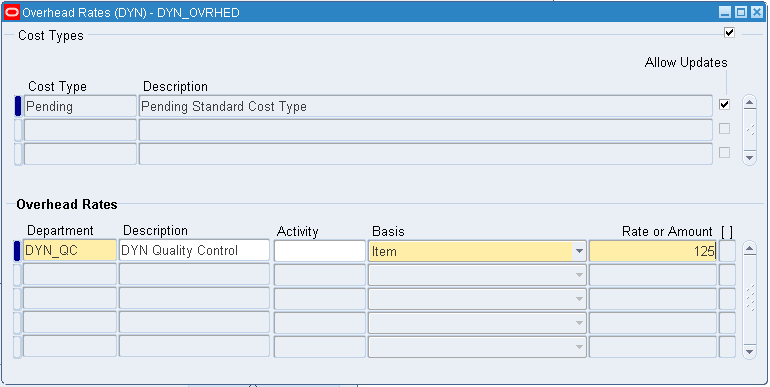
STEP 14: DEFINE OVERHEADS
Responsibility: Inventory Navigation: Setup > Costs > Sub-Elements > Overheads
Enter the Overhead Name and select the Cost Element then enter the Overhead Absorption Account
Assign Overhead department and overhead Rates:
Click on "Rates" and enter the Overhead Amount
While entering the Overhead Rates, we need to enter the Department Name as well.
Basis = Item
Means, this Overhead Rate will be based on the item. Whenever we are using the Department "DYN_QC" this Overhead rate 125 USD will be applied.
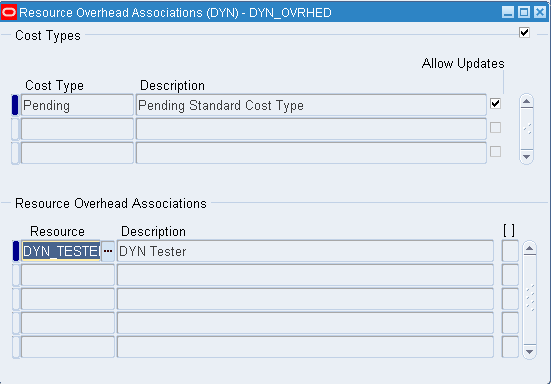
assign Overhead Resources:
Click on "Resources" and assign that Resource (Whatever the Department you have assigned, assign that department resource to this Overhead.
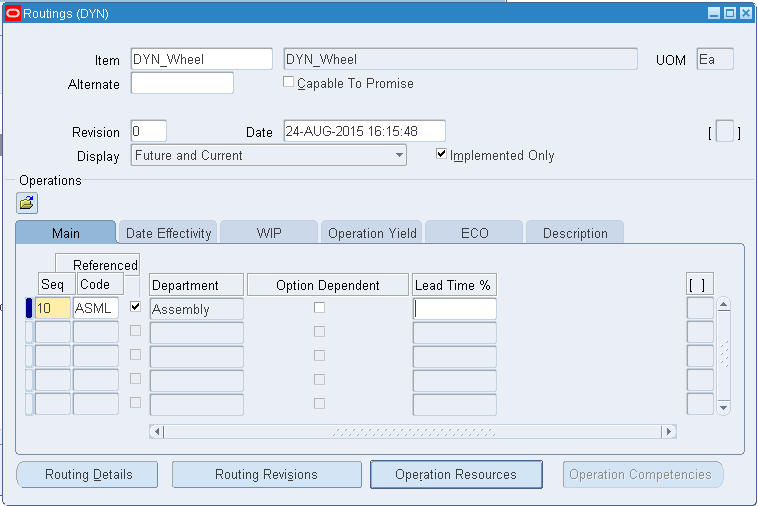
STEP 15: DEFINE ROUTING
Responsibility: Bills Of Material Navigation: Routings > Routings
Select the Organization as "DYN" and create the Routings for both the Assembly items
First create the Routings for the Sub-Assembly item " DYN_Wheel"
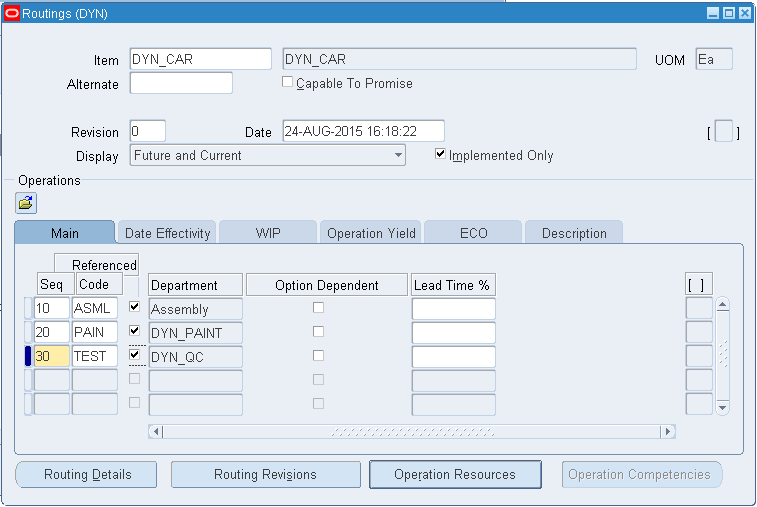
Likewise create the Routings for the End Assembly item "DYN_CAR"
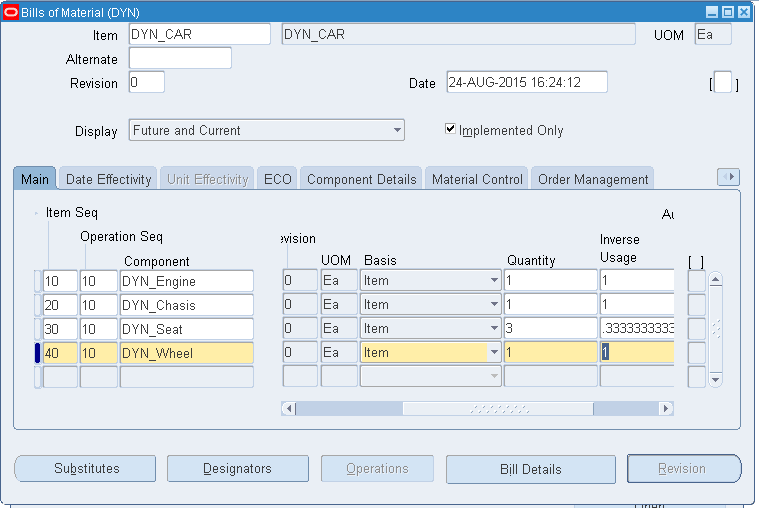
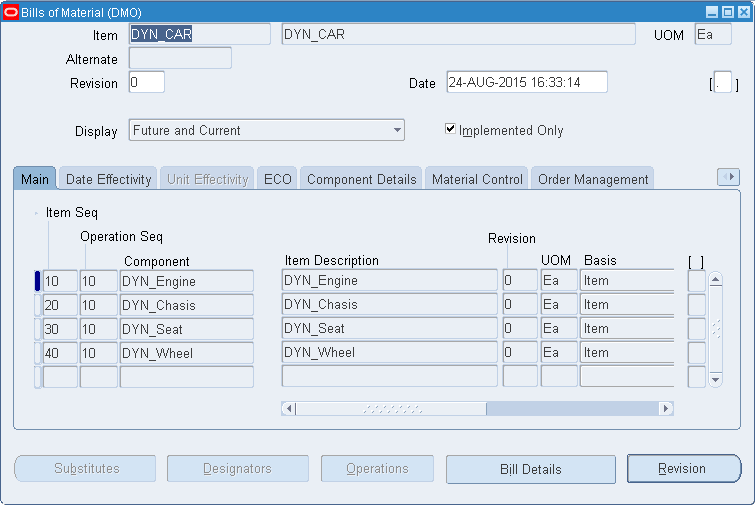
STEP 16: DEFINE BILLS
Responsibility: Bills Of Materials Navigation: Bills > Bills
First, create the Bills for Sub-Assembly item and then create the Bills for Main Assembly Item
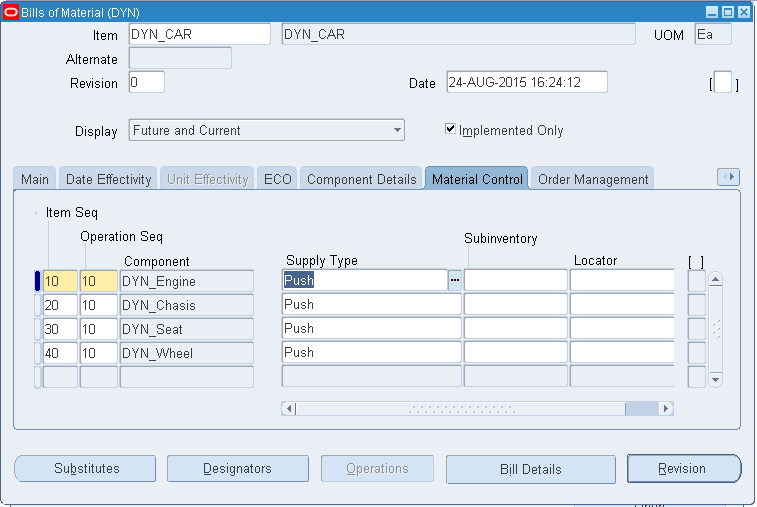
Make it the Supply Type as "Push"
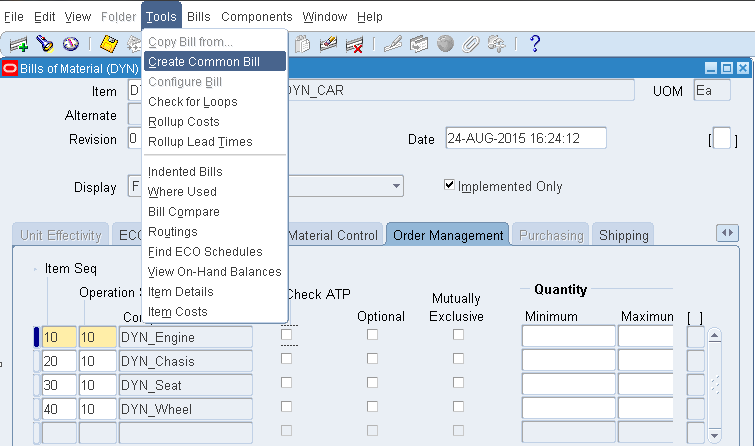
Create Common Bills:
This Bill was created in "DYN" organization and it's a manufacturing org. So, we need to create the Bill in Master Organization as well. To create the Common Bill in Master Org, navigate to
Tools > Create Common Bills
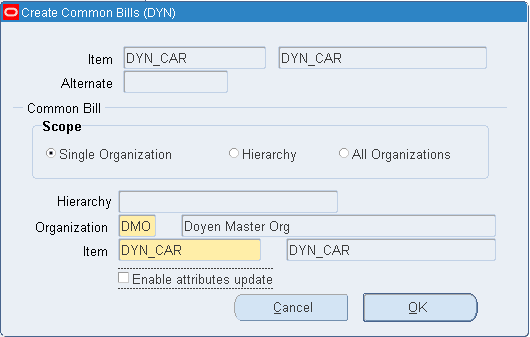
Enter the Master Organization and the item
Click on "OK"
"Create Common Bills" program will be submitted automatically
Query this Bill in Master Org "DMO" and it will be available
This completes the Bill Of Materials
STEP 17: UPDATE STANDARD COST:
Responsibility: Inventory Navigation: Costs > Standard Cost Update > Update Costs
Run the "Update Standard Costs" program for "Pending" Cost Type
"Submit" the " Update Standard Costs" program in DYN Organization
Note:
Make sure the Inventory Period is open for our organization "DYN"
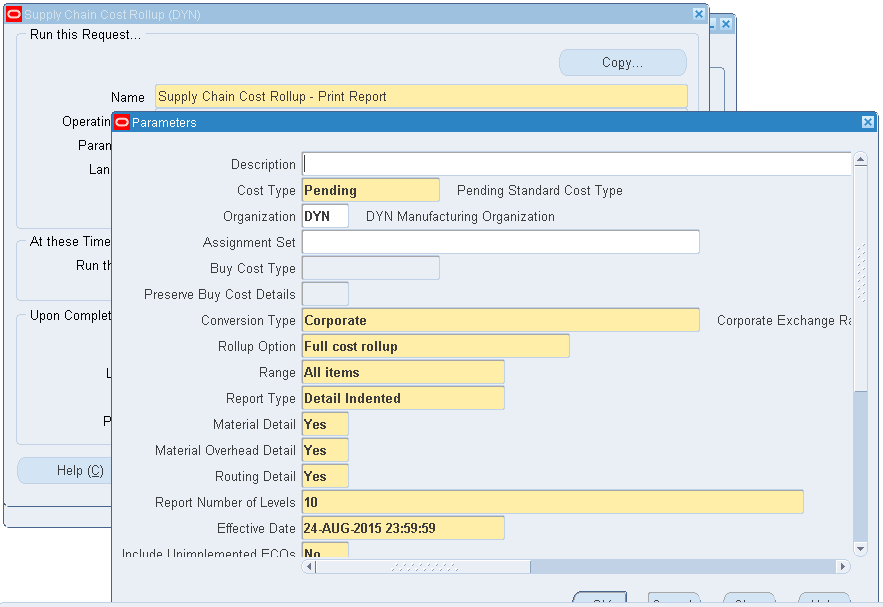
STEP 18: RUN COST ROLL-UP
Responsibility: Cost Management SLA
Navigation: Supply Chain Costing > Supply Chain Cost Rollup
Submit a single request "Supply Chain Cost Rollup - Print Report"
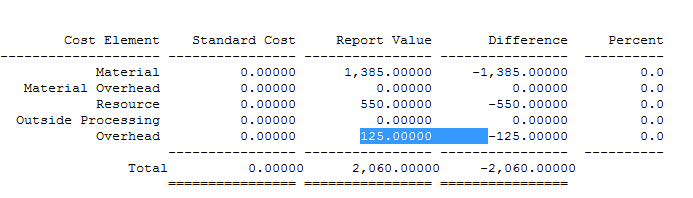
Check the Output for "Supply Chain Cost Rollup - Print Report"
Item Roll-up Cost for "DYN_CAR"
STEP 19: COST ROLL-UP CALCULATION:
Material Cost:
Items
|
Template
|
Item Cost
|
Qty Required
|
Material Cost
|
DYN_CAR
|
Finished Goods
|
|
1
|
1385
|
DYN_Engine
|
Purchased Item
|
500
|
1
|
500
|
DYN_Chasis
|
Purchased Item
|
400
|
1
|
400
|
DYN_Seat
|
Purchased Item
|
75
|
3
|
225
|
DYN_Wheel
|
Sub-Assembly
|
|
1
|
260
|
DYN_Tyre
|
Purchased Item
|
25
|
4
|
100
|
DYN_Rim
|
Purchased Item
|
30
|
4
|
120
|
DYN_Axle
|
Purchased Item
|
20
|
2
|
40
|
Resource Cost:
Resource Name
|
Type
|
Item
|
UOM
|
Charge Type
|
Usage
|
Inverse
|
Rate
|
Total Amount
|
DYN_A_MCHN
|
Machine
|
DYN_CAR
|
HR
|
WIP Move
|
0.5
|
2
|
200
|
100
|
DYN_A_LBR
|
Person
|
|
HR
|
WIP Move
|
1
|
1
|
75
|
75
|
DYN_HELPER
|
Person
|
|
HR
|
WIP Move
|
2
|
0.5
|
50
|
100
|
DYN_TESTER
|
Person
|
|
HR
|
WIP Move
|
1
|
1
|
100
|
100
|
DYN_A_MCHN
|
Machine
|
DYN_Wheel
|
HR
|
WIP Move
|
0.5
|
2
|
200
|
100
|
DYN_A_LBR
|
Person
|
|
HR
|
WIP Move
|
1
|
1
|
75
|
75
|
Total Resource Cost
|
550
|
Overhead Cost:
Name
|
Department
|
Resources
|
Rate
|
DYN_OVRHED
|
DYN_QC
|
DYN_TESTER
|
125
|
Roll-up Cost for Item "DYN_Wheel"
Material Cost: 260
Resource Cost: 175
Overhead Cost: 0
Total Cost: 260 + 175 = 435
Roll-up Cost for Item "DYN_CAR"
Total Cost: 1385 + 550 + 125 = 2060 USD
----- RAJU DEVARAJ
drajudevaraj@gmail.com